Sunday, May 23, 2010

Roof Trusses

The prefabricated roof trusses took very little time to install.  Mac Pfifer is the framing contractor and with his crew and the help of a boom truck, placed all trusses in one morning.  It took them the rest of the day and the following morning to tie it all down and tie it all together.  This view shows the vaulted ceiling shape of the screened porch.  The space from which the picture is taken will be the carport.
There is no real front or back to the house.  There is a primary entry on one corner, but the screened porch is designed to be a living area and is contiguous to the kitchen, dining area, and den.  
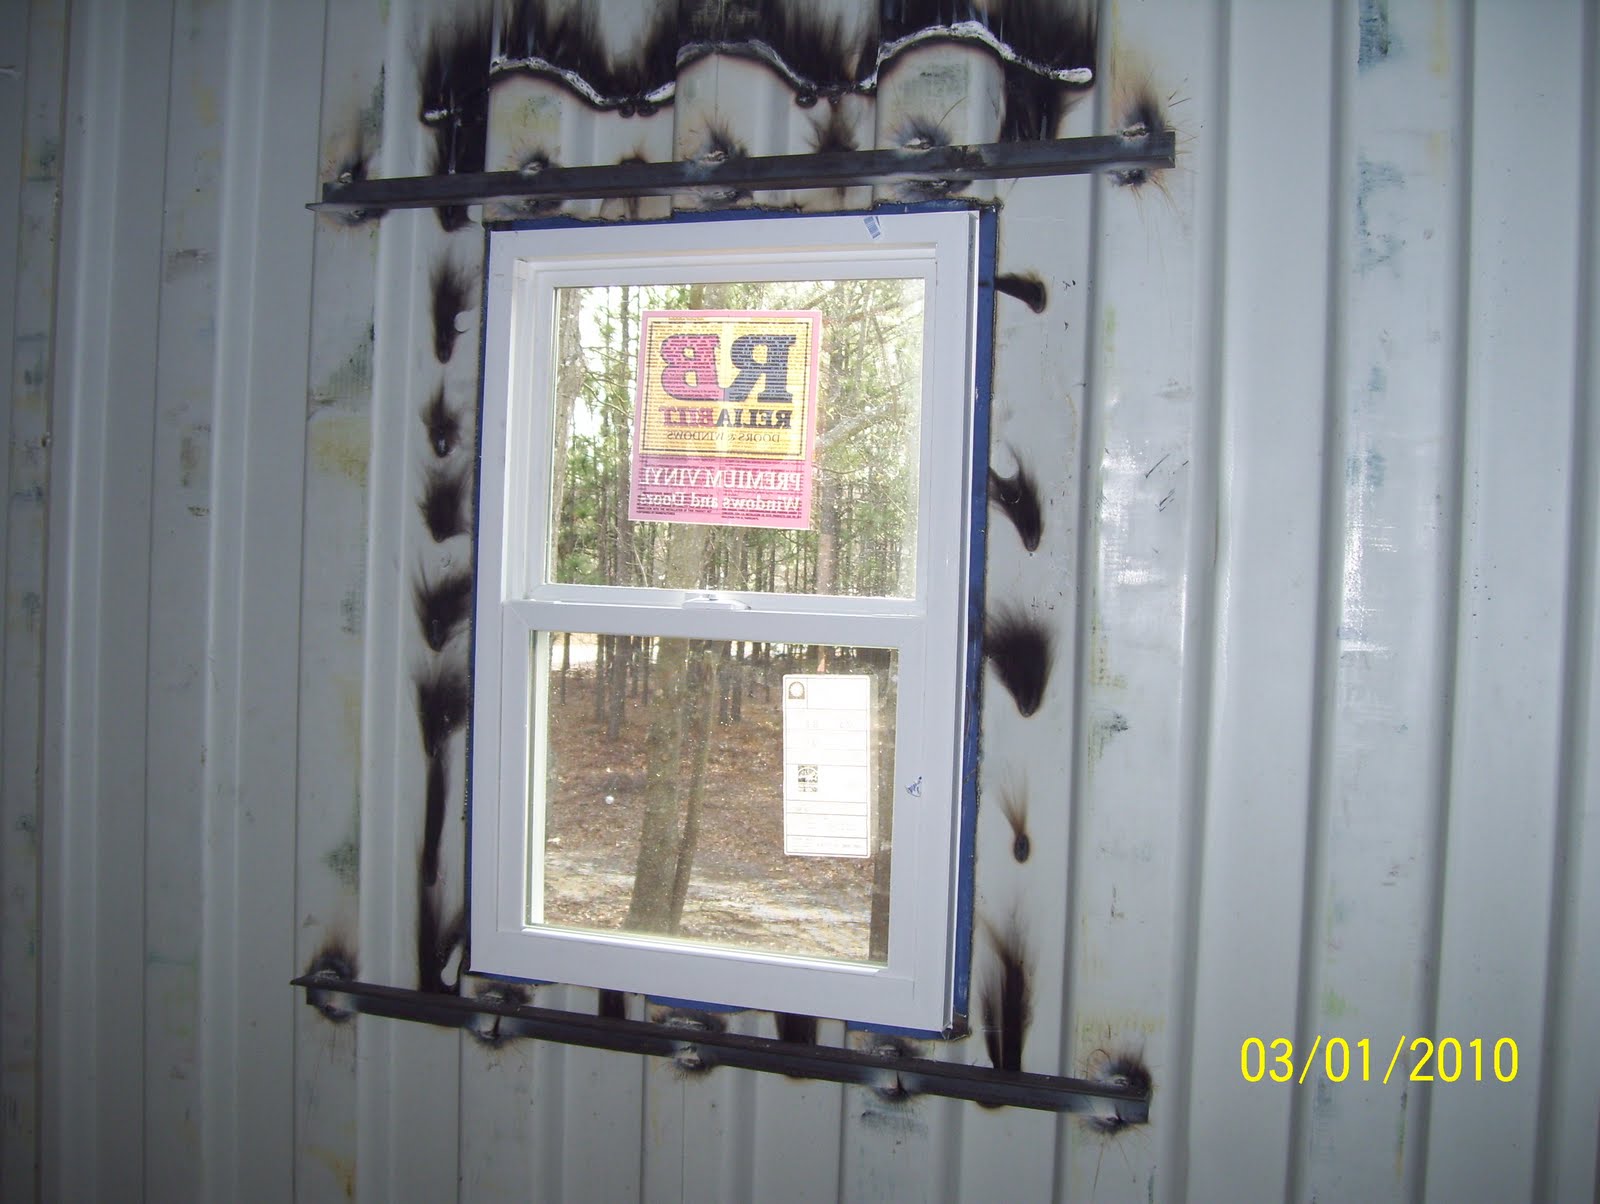
The roof extends over the entry porch.  We plan to leave the container doors in place (second container to the right), to be closed for security when the house is locked.  When not in use, the container doors will be opened against the adjacent containers.  Storm/security shutters may be installed over the windows using the cutouts from the window holes.  This may happen later depending on money and schedule. 

Interior Framing and Screened Porch

The screened porch is approximately 16' x 24'.  It must accomodate a Pawley's Island Hammock and a picnic table.  It is supported by concrete piers on the outside and brackets welded to the container on the inside.  This view shows the the sliding glass door (salvage) to the den and the kitchen window which is over the sink. 


Interior framing has been installed.  We made the decision to frame out inside because sprayed urethene insulation was expensive, plus Johnny felt that the plumbing and electrical would be less expensive to install within the interior framing.    The rooms are all clearly defined now and one can get the feel of the layout.  The living room windows are shown from the inside.  The windows must still be sealed with foam from the inside and outside to connect the framing on the inside and to close the corrugations on the outside.  The windows must also be loosened and caulked between the window and the container.  One window will have to be replaced as it had been broken by vandals.

Progress Again

In order to make the unit as tight as possible, I chose not to penetrate the top of the containers.  Upright bolts are welded to receive two wood 2x4 anchor plates for the trusses.  You can see the corner block with holes used for lifting and locking the ocean going container.  The anchor plates will have to fitted around the corner block. The first of the 2x4 anchor plate is bolted down.  A second anchor plate will be attached to the first.  This run is along the front of the house.  Both anchor plates have been attached to the entire perimeter of the house.  Beams have been installed.  The beams were necessary to cover the porches, where there was no container to support the trusses.  Temporary posts are supporting the beams.  Hollow posts will replace the temporary posts, through which hurricane straps embedded in the foundation will tie the beams and roof trusses to the foundation.  Brackets had to be fabricated from 1/4" steel plate, and welded to the containers to receive the beams.  The brackets are approximately 3" wide x 11" high x 8" deep.  The same brackets were welded to the container to receive the support beams for the floors of the porches.  I feel sure there are standard manufactured brackets that can be purchased to avoid having to have them fabricated. 

Tuesday, March 30, 2010

Windows, doors, and other musings.


3/30/10 Things continue to move slowly for several reasons.  The rainy weather has caused delays.  The contractor is trying to juggle several jobs.  Since it is a new concept for the county building inspectors, everything must be engineered and stamped.  It is a new process for the engineer and he, too, is juggling jobs and doing research.  Since the last post, we have gotten all the windows and the sliding glass door installed.  Windows and doors are built to be installed against a flat surface, which must be created within a corrugated wall.  We tried two different ways of installing the windows.  One of the pictures shows how we have used 1/8" flat stock to bridge the low spots in the corrugation. Angle iron was used to true and stiffen the wall to receive the window.  The other was a full frame made of angle iron.  Another picture shows the concrete block bases for the support posts for the porch and carport roof. We hope to begin the framing next week which includes installing the roof trusses, building the decks and framing out the inside.  As to the inside framing, we determined that an exterior sprayed foam shell was too expensive and we would use conventional insulation within an interior wood frame.  Johnny felt this method would make electrical and plumbing installation more efficient.  We are planning to further insulate and increase retro-reflectivity by adding ceramic beads to the exterior paint (see NASA web site on ceramic paint).  We continue to shop at the Habitat for Humanity ReStores.  An eight foot entry door with side lights for $95 is hard to beat.  We also bought a full set of kitchen cabinets (no countertop) for $800.  If anyone has questions or comments or suggestions as to information sources, you can email me at john@marmacwire.com.

Friday, January 22, 2010

Slow Progress


1/22/09 Since the last post, Johnny and his crew have finished welding the containers together. Since the roof will not be installed until later, the containers had to be sealed where they joined. It took two tries but the second effort was tight.

Next the container walls were cut out where not needed. We now, more or less, have one big room. The next step will be to put in the interior divider walls that will define each room.

We are now debating whether it will be more cost effective to insulate with exterior spray foam or with interior conventional stud wall and insulation. We are trying to understand the pros and cons of "ceramic" paint, and whether to use inside, outside, both, or not at all.
We are also trying to understand the best and most efficient way to install exterior windows and doors.


Thursday, December 31, 2009

Big Day: Container Placement !


12/30/09 Today is a big day. It was difficult to get everything coordinated exactly. There was some waiting by the rigger due to a delay in one of the container deliveries. Ashley Baucom and his son from Union Crane Service did a great job with the rigging and placement. As you can see from the pictures, there are some big trees close to the foundation. While we broke a few limbs, Ashley did a GREAT job of swinging the containers through the trees and onto the foundation. Although today was the first time we had seen the containers, they fit perfectly on the foundation Johnny and his crew had built. Johnny then welded the containers to the metal foundation plates.

Tuesday, December 29, 2009

Foundation Weld Plates


12/29/09 This series shows a completed foundation wall with anchor bolts protruding from the bond beam. Clint is cutting off the anchor bolts and burning holes in the steel plates to accept the anchor bolt stubs. Johnny is welding the steel plates to the anchor bolt stubs. Tomorrow we plan to set the containers in place and weld them to the foundation.


Saturday, December 12, 2009

Observation

As I ride around South Carolina, and other states, too, I see benches, swings, and little “garden spots” that people have created in their yards. Most appear neglected and unused. I can only speculate as to why someone would take the time and trouble to create such a spot, only to ignore it. Maybe it is because we wish for a place and time to sit and contemplate some view, our yard, a flowerbed or garden. In a burst of energy, we create the place to sit, but fail to ever create the time to sit.

I think the same thing may be true of porches. You now see many houses with porches, but how often do you see a porch with one or more people sitting on it? I remember my grandparents’ porch in Cowpens, South Carolina. Whenever we visited, we would always end up on the porch. The porch faced a busy highway. It never failed that after we sat for a while, someone would stop to visit. Often we would end up with as many visitors as family members.

I remember my Grandmother’s porch in McBee, South Carolina. Her front porch was only a formal decoration on the front of the house, but her back porch was where she and I sat and rocked and discussed things of great and serious import. I suspect that many of us remember porches in association with a different time and place, and somehow believe that building a porch will recreate that old feeling.

Is it for the same reason we bring back souvenirs from vacation? Is it for the same reason we are inspired by the architecture or landscaping from a vacation destination? All of these considerations come to my mind as I am creating this space to live in. Do we build our spaces to support and affirm the lifestyle we have chosen, or do we build our spaces in a wish to be somewhere else?

Thursday, December 10, 2009

Foundation Walls Almost Complete


The foundation is almost complete. Concrete must be poured into each cavity containing the rebar uprights and vermiculite insulation in all remaining cavities. All that is left to complete the foundation is to bend down the uprights, tie them to the bond beam rebar, and pour the bond beam.
Rain continues to delay the work. Trying to coordinate work around the weather, other work, and inspectors is no small task.

Friday, November 27, 2009